Validating forms with pure vanilla JavaScript
Forms occupy a very important part of a web application. An application makes use of it to receive entries from the users. Most activities done on a website, some of which include: Registration, Login, Onboarding, Application for a job, etc. mostly make use of forms in one way or the other. It plays a great pivotal role in the overall user flow of an application. Therefore, this fact has made it become a fundamental web element we need to pay key attention to.
There are several factors to look and consider while developing a form, some of which are the usability, accessibility and lastly validation, just to mention but a few. Having known the important role a form plays in a web application, in this article we shall be discussing the best and most efficient ways of validating a form using pure vanilla JavaScript, without the influence of any framework or libraries.
What does validation mean?
According to Wikipedia, Validation in computer science simply means ensuring that data inserted into an application satisfies defined formats and other input criteria.
wikipedia
In order words, Validation is the process of putting a check on various input fields in a form, in order to ensure that all the entries meet certain formats or criteria. So as a developer when building out a form, I decide to for example only allow a minimum of let’s say 5 letters and maximum of 15 letters in an input field that receives Full name, then I am applying validation to that form.
Forms can be validated in two ways basically, which are:
- Client-side or Front-end validation and
- Server-side or back-end validation.
However, In this article, the focus shall be on the Client-side validation. Having known what validation is, and the types of validation, Let’s talk a little bit about client-side validation.
Client side approach to validating forms
Each time you visit a website and try to fill a form, sometimes you usually get feedbacks like these: “Password is too short”, “This field is required”. This is called client-side validation. It is divided into two. They are :
- Built-in form validation using the HTML5 and
- Javascript validation.
How to validate a form using JavaScript?
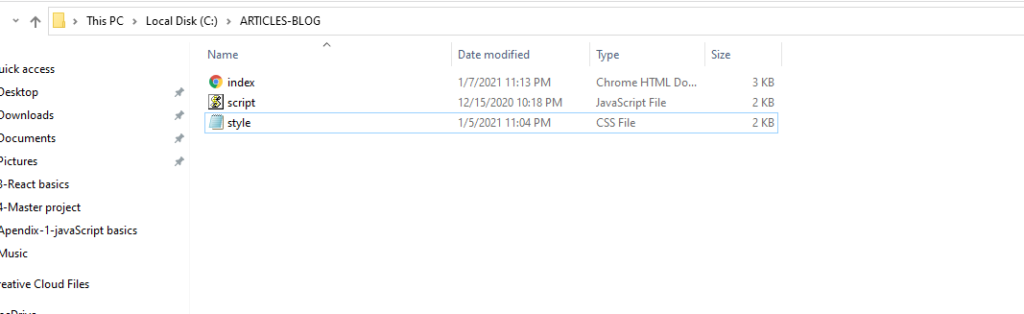
I will work you through creating a simple HTML 5 signup form, after which we shall apply validation to the form. So right now, head on to Vscode or your favourite text editor, create a folder and within the folder create 3 files named: index.html, style.css and script.js. see the screenshot below:
After creating the folder, and the files within, open the index.html file, and code the form containing 6 fields which are: full name, phone number, email address, website URL, password and confirm password. These fields are selectively chosen by me as they are a bit tricky and appears in most form validation in real-life projects and scenario. Not to worry don’t crack your head too much, just pick up a cup of coffee, while I provide you with the source code for that.
Notice that I made use of the HTML5 required attribute which helps in validating the form to an extent. I will talk more about that later. Below is the source code in action, coded with HTML5, just copy and paste in your index.html:
HTML source code
<!DOCTYPE html>
<html lang="en">
<head>
    <meta charset="UTF-8">
    <meta name="viewport" content="width=device-width, initial-scale=1.0">
    <title>Form Validation</title>
    <link rel="icon" type="image/png" href="">
    <link rel="stylesheet" href="style.css">
</head>
<body>
    <div class="container">
        <h1>Registration</h1>
        <!-- Form -->
        <form id="form" novalidate>
          <!-- Full Name -->
          <div class="form-group">
            <label for="name">Full Name</label>
            <input type="text" id="name" name="name"
                   placeholder="Full Name" required>
          </div>
          <!-- Phone Number -->
          <div class="form-group">
            <label for="phone">Phone Number</label>
            <input type="tel" id="phone" name="phone"
                   placeholder="555-555-5555" required >
          </div>
          <!-- Email Address -->
          <div class="form-group">
            <label for="email">Email Address</label>
            <input type="email" id="email" name="email"
                   placeholder="email@address.com" required>
          </div>
          <!-- Website URL -->
          <div class="form-group">
            <label for="website">Website URL</label>
            <input type="url" id="website" name="website"
                   placeholder="http://jacinto.design" required>
          </div>
          <!-- Password -->
          <div class="form-group">
            <label for="password1">Password</label>
            <input type="password" id="password1" placeholder="Create Password (Min. 8 characters)" required >
          </div>
          <!-- Confirm Password -->
          <div class="form-group">
            <label for="password2">Confirm Password</label>
            <input type="password" id="password2" placeholder="Confirm Password"
                   required  name="password">
          </div>
          <button type="submit">Register</button>
        </form>
        <!-- Error/Success Message -->
        <div class="message-container">
          <h3 id="message">Don't Hesitate!</h3>
        </div>
      </div>
<script src="script.js"></script>
</body>
</html>
For the styles, I made use of a Sans serif Google font called Sen, so I imported it as seen in the first line of code in style.css. I won’t explain much of the block of codes in the style.css since the focus of this article is not CSS but the use of vanilla JavaScript to validate forms. To style the view, open the style.css file and paste code below:
CSS source code
@import url('https://fonts.googleapis.com/css2?family=Sen&display=swap');

html {
    box-sizing: border-box;
  }

  body {
    margin: 0;
    min-height: 100vh;
    font-family: 'Sen', sans-serif;
    letter-spacing: 2px;
    display: flex;
    align-items: center;
    justify-content: center;
    background: lightblue;
  }

  .container {
    width: 480px;
    height: 630px;
    background: white;
    display: flex;
    flex-direction: column;
    align-items: center;
    border-radius: 10px;
    box-shadow: 0 5px 30px 10px rgba(0, 0, 0, 0.4);
  }

/* Form */
form {
    width: 90%;
  }

  .form-group {
    height: 65px;
  }

  label {
    position: relative;
    bottom: 3px;
  }
  input {
    width: 100%;
    height: 34px;
    padding: 5px;
    border: 1px solid black;
    border-radius: 5px;
    outline: none;
    box-sizing: border-box;
    /*Ignoreanypadding,andensurethewidthisnotmorethan100%*/transition: all 0.3s;
    -webkit-transition: all 0.3s;
    -moz-transition: all 0.3s;
    -ms-transition: all 0.3s;
    -o-transition: all 0.3s;
}
  input:valid {
    border: 1px solid green;
  }

  input:invalid {
    border: 1px solid red;
  }

  button {
    cursor: pointer;
    color: white;
    background: black;
    border: none;
    border-radius: 5px;
    height: 50px;
    width: 100%;
    font-family: Sen, sans-serif;
    font-size: 20px;
    letter-spacing: 2px;
    margin-top: 5px;
  }

  button:hover {
    filter: brightness(200%);
    background: rgb(22, 22, 22);
  }

.message-container {
    border: 1px solid black;
    border-radius: 5px;
    width: 90%;
    margin-top: 20px;
    display: flex;
    justify-content: center;
    color: black;
  }
You shoud get a beautifully styled Registration form looking like this:

Let’s now heard on to the validation of the form proper. Notice in the body of the index.html file before the </body> closing tag, that I have linked the HTML page externally to a javascript “script.js” file. You can either code your javascript(logic) for validating, within your HTML file inside a <script></script> tag or doing it the same way I have done it, which is actually the most recommended and standard practice.
Now we are going to modify our index.html inorder to prepare it for validation. In your index.html file copy and paste this code below to modify it:
HTML modified source code
<!DOCTYPE html>
<html lang="en">
<head>
    <meta charset="UTF-8">
    <meta name="viewport" content="width=device-width, initial-scale=1.0">
    <title>Form Validation</title>
    <link rel="icon" type="image/png" href="">
    <link rel="stylesheet" href="style.css">
</head>
<body>
    <div class="container">
        <h1>Register Today!</h1>
        <!-- Form -->
        <form id="form" novalidate>
          <!-- Full Name -->
          <div class="form-group">
            <label for="name">Full Name</label>
            <input type="text" id="name" name="name"
                   placeholder="Full Name" required minlength="3" maxlength="100">
          </div>
          <!-- Phone Number -->
          <div class="form-group">
            <label for="phone">Phone Number</label>
            <input type="tel" id="phone" name="phone"
                   placeholder="555-555-5555" required pattern="[0-9]{3}-[0-9]{3}-[0-9]{4}">
          </div>
          <!-- Email Address -->
          <div class="form-group">
            <label for="email">Email Address</label>
            <input type="email" id="email" name="email"
                   placeholder="email@address.com" required>
          </div>
          <!-- Website URL -->
          <div class="form-group">
            <label for="website">Website URL</label>
            <input type="url" id="website" name="website"
                   placeholder="http://jacinto.design" required>
          </div>
          <!-- Password -->
          <div class="form-group">
            <label for="password1">Password</label>
            <input type="password" id="password1" placeholder="Create Password (Min. 8 characters)"
                   required pattern="^(?=.*\d)(?=.*[a-z])(?=.*[A-Z])(?=.*[a-zA-Z]).{8,}$"
                   title="Please include at least 1 uppercase character, 1 lowercase character, and 1 number.">
          </div>
          <!-- Confirm Password -->
          <div class="form-group">
            <label for="password2">Confirm Password</label>
            <input type="password" id="password2" placeholder="Confirm Password"
                   required pattern="^(?=.*\d)(?=.*[a-z])(?=.*[A-Z])(?=.*[a-zA-Z]).{8,}$" name="password">
          </div>
          <button type="submit">Register</button>
        </form>
        <!-- Error/Success Message -->
        <div class="message-container">
          <h3 id="message">Don't Hesitate!</h3>
        </div>
      </div>
<script src="script.js"></script>
</body>
</html>
Brief explanation of the HTML modified source code
We made the following changes to modify our index.html and prepare it for vanilla JS validation: We added an error message using the title element in the password field. We also added regular expression codes which will be used to help validate or specify a particular pattern of entries that will be accepted by the password and phone numbers fields. Notice that the form has an id=”form” likewise all the various inputs fields, These will be used for validation in our javascript.
You will recall that I mentioned “built-in form validation” as one of the ways for validating forms on the client-side. The HTML5 “required” attribute plays a key role by ensuring all fields are completely filled before the form can submit. Other useful elements are the input types we made use of, minlength, maxlength and pattern we made use of in the HTML.
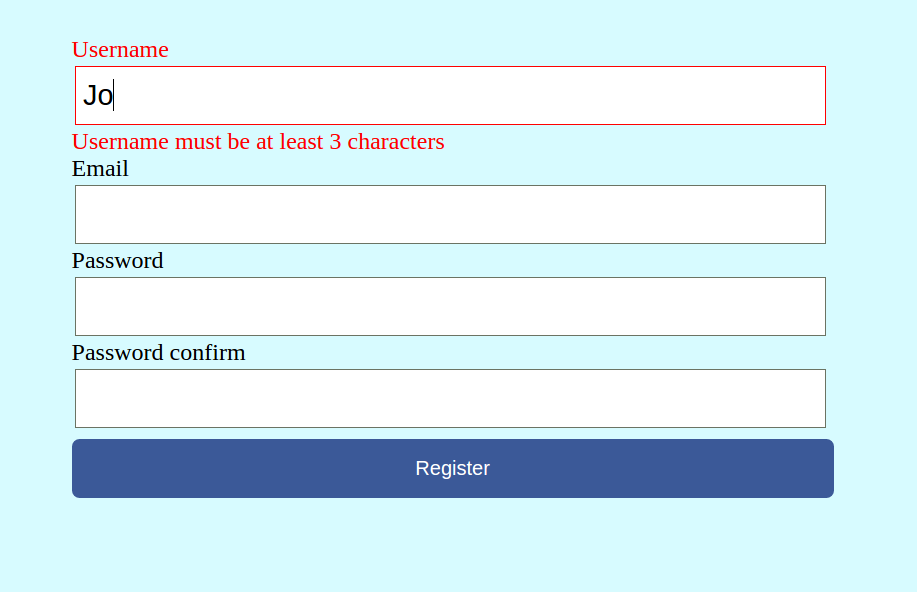
Take out the “no validate” code on the form opening tag and try submitting the form, you will see the HTML5 inbuilt validation in action, you will get this feedback: “Please fill out this field”. See screenshot below:

N:B The only way for validation to work currently on this form is to prevent the form default behaviour, which is to submit all entries to a server as you will normally encounter on a real-life project. To do this, simply make a reference to the form id in the HTML inside our javascript file “script.js”, then listen for a submit event and call the method e.preventDefault(). Check this link to learn more about that, or just proceed, cause I will provide you with all the source code.
Validating the form with JavaScript
To add vanilla Javascript validation, open script.js file copy and paste this code below:
const form = document.getElementById('form');
const password1El = document.getElementById('password1');
const password2El = document.getElementById('password2');
const messageContainer = document.querySelector('.message-container');
const message = document.getElementById('message');

let isValid = false;
let passwordMatch = false;

function validateForm(){
    // Using Constraint API
    isValid = form.checkValidity();
// style main message for error
if(!isValid){
message.textContent = 'Please fill out all fields.';
message.style.color = 'red';
messageContainer.style.borderColor = 'red';
return;
}
// Check to see if password match
if(password1El.value === password2El.value){
    passwordMatch = true;
    password1El.style.borderColor = 'green';
    password2El.style.borderColor = 'green';
}else {
    passwordMatch = false;
    message.textContent = 'Make sure passwords match';
    message.style.color = 'red';
    messageContainer.style.borderColor = 'red';
    password1El.style.borderColor = 'green';
    password2El.style.borderColor = 'green';
    return;
}
// if form is valid and password matches
if(isValid && passwordMatch){
    message.textContent = "Successfully registered!!";
    message.style.color = "green";
    messageContainer.style.borderColor = 'green';
}
}

function storeFormData(){
    const user = {
    name: form.name.value,
    phone: form.phone.value,
    email: form.email.value,
    website: form.website.value,
    password: form.password.value
        };
    // Do something with user data
    console.log(user);
    }

function processFormData(e){
    e.preventDefault();
// Validate form using constraint validation
validateForm();
// Submit data if valid
if(isValid && passwordMatch){
    storeFormData();
}
}

//Event listener
form.addEventListener('submit', processFormData);
Brief explanation of the Javascript code
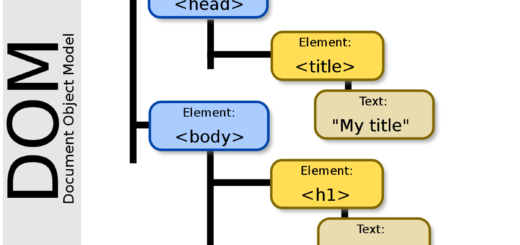
Now let’s see what’s going on, what the logic here is all about. In the first block of code from 1-5, we made a reference to the form, the feedback div holding our error message and all input fields. We did that by selecting them and storing them in a constant variable. It is pertinent, I state here that whenever you want to manipulate the DOM (Document Object Model) in Javascript, this is the first step to take, cause it gives you access to specific HTML elements you want to manipulate with your logic.
Furthermore, I declared two variables: isValid and passwordMatch which are booleans. They both will be used in a condition statement while validating the forms.
At the bottom, I added an event listener to the form variable now holding the form element to listen for a submit event, which triggers the function processFormData.
The processFormData function

This function has an event passed alongside to enable us to call the prevenDefault method, thereby preventing the default form behaviour which is submitting the form entries to the server. There are basically two functions that were called in the processFormData function, they are: storeFormData and validateForm(). Both functions can be seen above.
The validateForm function
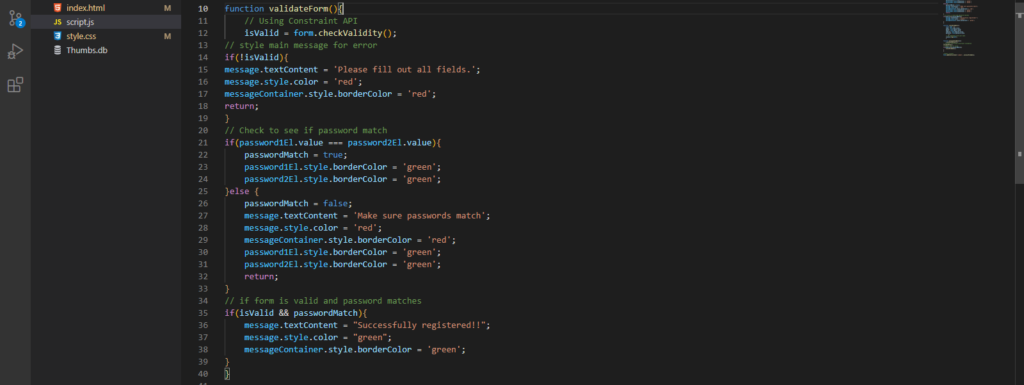
For validating the form we made use of Constraint API in the validateForm function. I will drop some links after concluding below incase you want to read and learn more on that. This function (validateForm) contains three condition statement. The first checks whether the form is valid, the second checks whether both password and confirm password match, while the third checks whether the form is valid and both passwords match.
The storeFormData function

The storeFormData function contains a user object whose properties are the various variables and their values(the entries entered by the user). This gets consoled to our browser console, on successful validation and form submission. Note that in a real-life scenario, we will be submitting to a server rather than consoling the user object to the browser console.
Notice that the form fields outline retains a red colour until all validation is passed. Once all entries meet the validation requirements, outline turns to green. This helps to give the user a great user experience, knowing the fact that the red colour means negative while the green colour is affirmative or positive. On clicking the submit button without filling the fields, an error message displays saying “Please fill out all fields”. One thing you could consider adding to improve the user experience is disabling the submit button until all validation is passed and all fields are successfully filled.
In conclusion, we have successfully developed a Registration form with proper validation, that alerts a user with the use of legends, colours and a feedback message to ensure the right entries are entered in the form. Below is a link to the repository, the codepen and some reference resources for a further study. This repo is provided for you, in case you prefer cloning and running on your system, it contains all the source code. Nevertheless, you could just copy and paste the source code from this article, you will end up with the same result.
Click here to access the Github repo. Please do not forget to follow me and leave a star on the repo. Click here to access the working form in Codepen.
Links to reference website and resources for further study
Check out some reference resources below to learn more:
https://css-tricks.com/form-validation-part-1-constraint-validation-html/
https://developer.mozilla.org/en-US/docs/Web/API/HTMLFormElement/submit_event
https://developer.mozilla.org/en-US/docs/Learn/Forms/Form_validation
https://html.com/attributes/input-pattern/
Thanks for reading this article to the end, I salute your courage, I hope you have practised all written here. I do hope you make use of the knowledge acquired from it in your next real-life project. Click here to Follow us (User Interface cabal) on Twitter if you have not. We hope to bring you high-quality Design and Web Front-end technologies articles. Kindly leave a comment and connect with me on Twitter by clicking here. Dropping my pen, for now, See you in the next article.


bookmarked!!, I like your website!
Thanks for the nice words. I modified it myself